UPAA Blog 2022-23 #16 - 3/30/23 (text by Jaren Wilkey, above photo by Brooklynn Jarvis Kelson)
It's safe to say BYU has an inspiring standard of excellence in the world of university photography. From their award-winning photos to their global reach, to their outstanding reputation for developing and mentoring student talent...anything they do, they do well and make it look effortless. (And they do it without coffee...how is that possible?) But that success is built on a foundation of thought, preparation and good old-fashioned legwork. You might have seen a recent video tour of the BYU studio. It's easy to imagine they've always been blessed with such a space, but the long story is they functioned without it for 50 years, and the space they now enjoy took...yes...thought, preparation and good old-fashioned legwork! Jaren Wilkey details some of the how and why behind their long-needed new home. -Ed.
************
For the first 50 years of BYU Photo’s existence, we didn’t have our own photo studio. We were located in an office in the administration building, which was just barely wide enough to drop a painted canvas background down from the ceiling so we could take portraits. Of course, once we attempted to photograph a portrait, the students had to stop what they were working on and go into the hallway; otherwise, they would be in the shot. Forget about trying to do a full-body shot, it was impossible in that space. The red carpet on the floor also made for a nasty magenta fill underneath the chin.
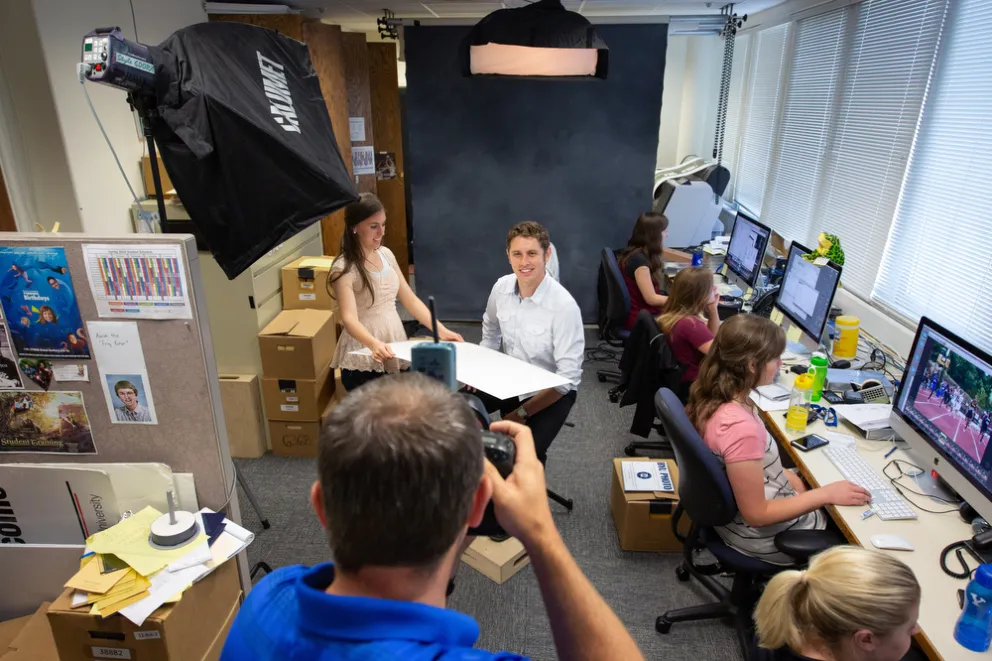
(photo by Jaren Wilkey)This was the BYU photo office in 2016. It appears the red carpet had been updated by this point, but it's still a challenging situation.
When you don't have a photo studio, you get really good at location lighting, and we had lots of practice. Any time we needed to do studio work we had to beg, borrow and sometimes steal a space to use while the janitors weren’t looking. Finding locations became a job unto itself, and it also became the major limiting factor on when we could schedule photo shoots. The where dictated the when.
(photo by Nate Edwards) BYU's "portable" (I wouldn't want to port it!) photo studio certainly produced good results but required a lot of time and labor to set up and tear down every time a studio-style shoot was required. Check out this video and blog article on the BYU crossbar, a clever solution to doing top-down lighting.
I remember one incident in particular. We were in the middle of a full-day marketing shoot for the football team in our indoor practice facility. Since the space was used for multiple athletic teams and physical education classes, we couldn’t schedule the space for the entire day. At 1 pm we had to break down the entire set, stack it against the wall, and shut down our production so that a karate class could hold their regularly scheduled session. After the class ended we spent another hour setting up the lights again so that we could continue with the shoot. It was so frustratingly inefficient.
Our bosses understood the need for a permanent studio space; the problem is that on any college campus, spaces are . . . difficult. It's even more challenging when you are looking for a big open space with high ceilings that is centrally located on campus. We searched every building looking for a space that would fit our needs and we finally found it in the basement of our Alumni Center. The room was unfinished and mostly being used for storage, but it had 14-foot high ceilings and it had a large open section that was devoid of windows.
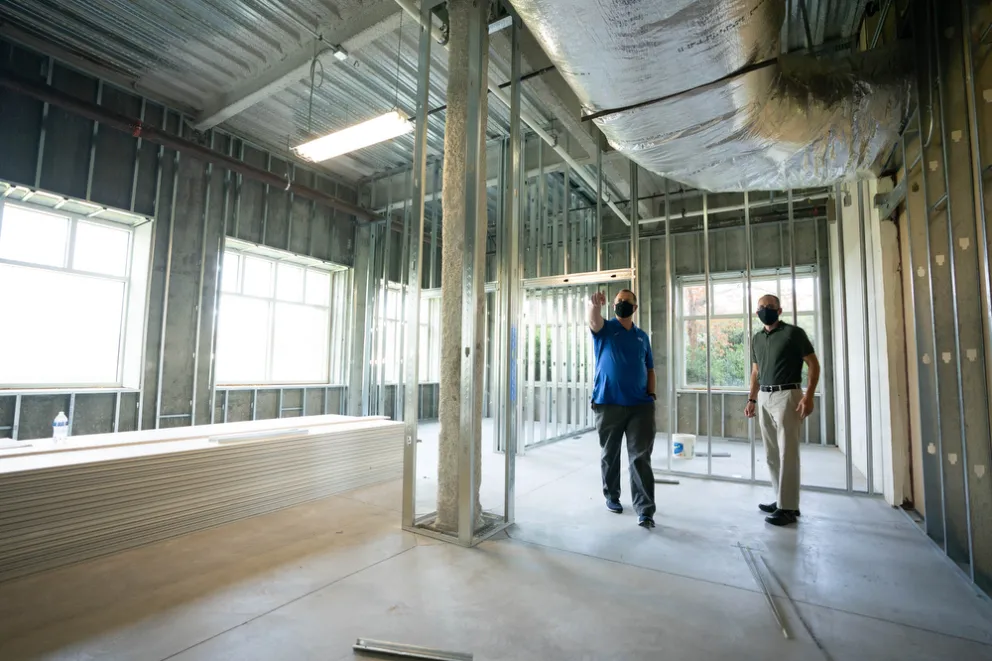
(photo by Claire Moore) Early in the build process--and the pandemic.
But to get that space I needed to write a proposal, something convincing that explained why the university should give us the space for the studio and the money to build it. Thankfully, I track all of our shoots via a shoot log, and with this data I could show exactly how inefficient our current model was. In the proposal I showed exactly how many photo shoots we did on location and how much time we were wasting traveling to, setting up, and breaking down our portable studio. I also explained that whenever we went on-location we needed to bring at least one student assistant to help with the setup and breakdown of the studio, and it was easy to calculate how much it cost to bring our own little moving crew to each photo shoot. It must have been convincing, because they gave us the green light to move forward.
Next I had to submit a proposed floor plan that would be used as the basis for the architect's plans. Nate and I visited several local photographers in their own studios to see how they designed their space and what they would do differently if they could start from scratch. Every single one said the same thing, make the space as big and open as possible. The size of the studio was always their biggest limiting factor.
Our goal was to build a studio that could accommodate anything that could be asked of a university photographer. To accomplish that we tried to make our studio space as open as possible. We wanted to minimize the use of permanent furnishings that couldn’t be moved around to accommodate a variety of subjects.
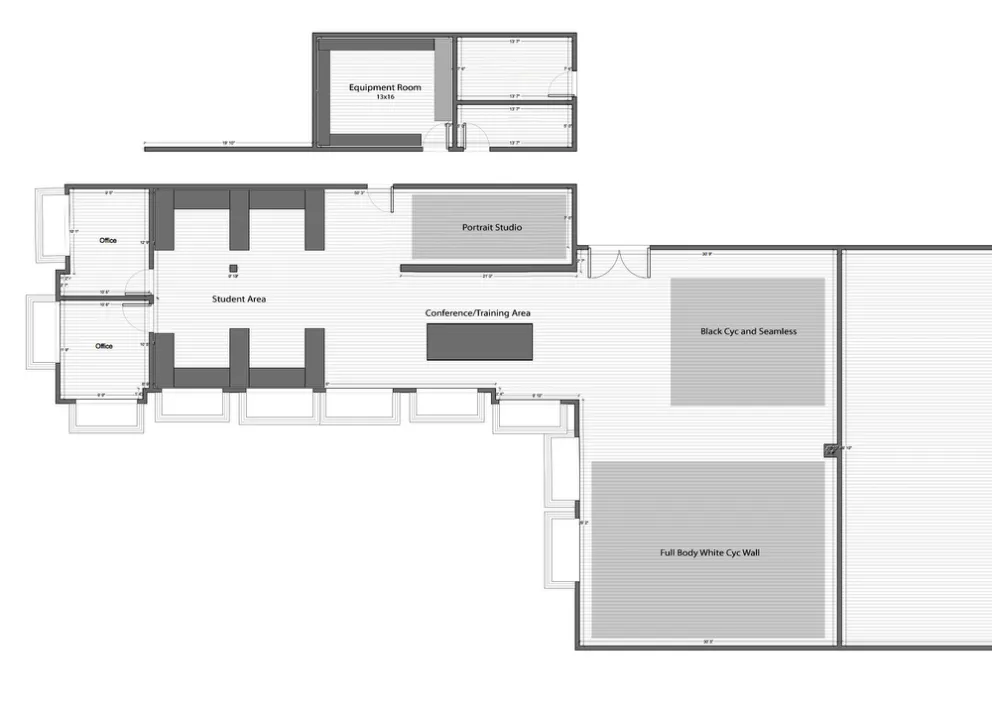
Floor plan of the entire space. Note how the plan for students' desks changed from perimeter desks to more of an island with low dividers after their input.
Construction began in March of 2020, just a week before the University shut down because of Covid. If you are planning a major construction project during a pandemic, get ready for delays. Supply chain issues hampered us for months--especially lighting fixtures. Because of the delays we were not able to move into the studio until November, about 4 months behind schedule. It actually took several more months to receive all of the furniture, studio lights and computer equipment needed to fully set up the studio. We’re finally at a point where I can say that the studio is finished. I’ll talk about each area of our studio and explain how we use each space.
Camera Room
Across the hall from our office we have a camera room, which is essentially our storage room for all of our cameras, lighting gear, tools and studio equipment. I always want our studio to be as uncluttered as possible, which is why this room is so important. We have shelving on every wall and a large counter that serves as our charging station and repair counter. All of our student kits are on one shelf, and the kits are color-coded. We use nail polish to mark each camera and lens to make sure that they stay organized. The room is always locked and controlled by card access so that we can protect our gear.
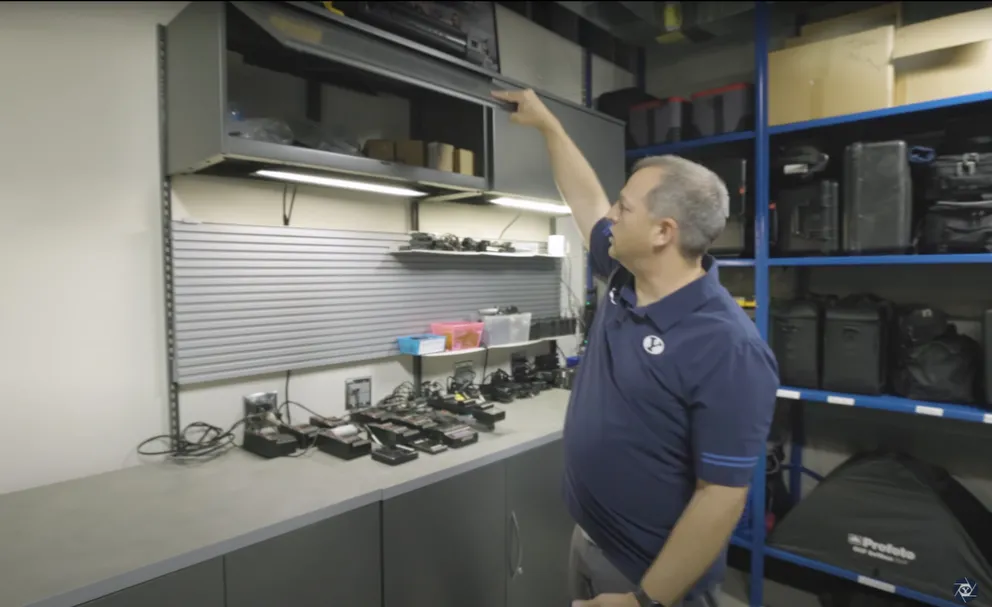
A still frame from the video tour shows Jaren in the equipment storage room.
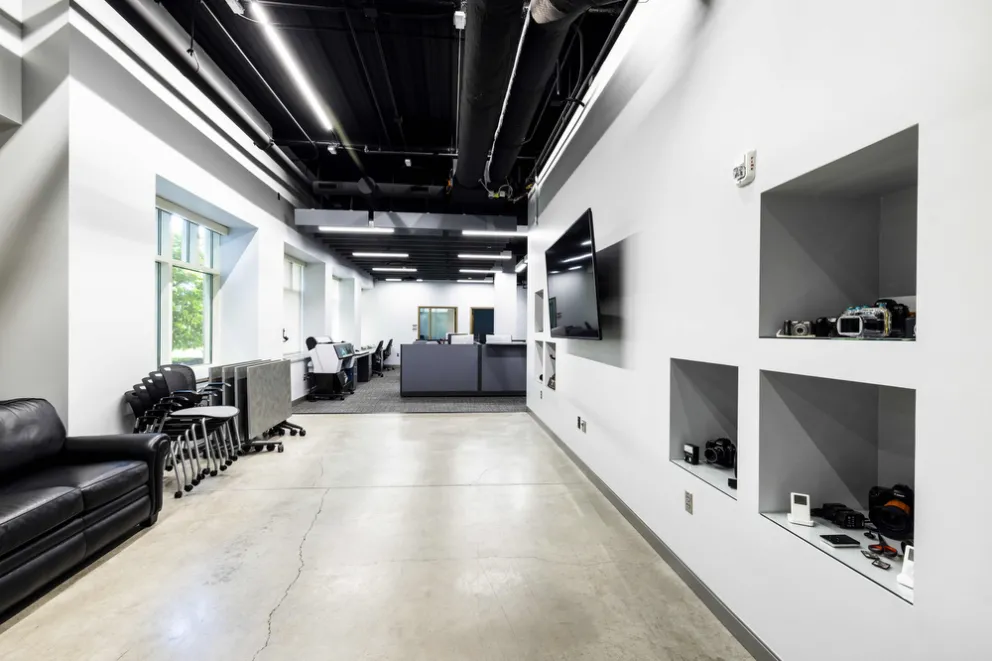
Office Space
One of the biggest challenges we had in our old office space was that we didn’t have enough desks for our entire staff of students to work at the same time and we didn’t have a dedicated meeting space for staff meetings. In the new office, we made sure to have enough workstations for every student, with some extra space left open for future staff additions. We asked our students if they wanted cubicles so they wouldn’t be distracted or if they wanted it to be more of an open concept. They chose a combination of the two, cubicles with low dividers so that they could still interact with one another while still maintaining personal space. We also added a wall-mounted TV that we use when we are going over the calendar in staff meetings and for staff training sessions.
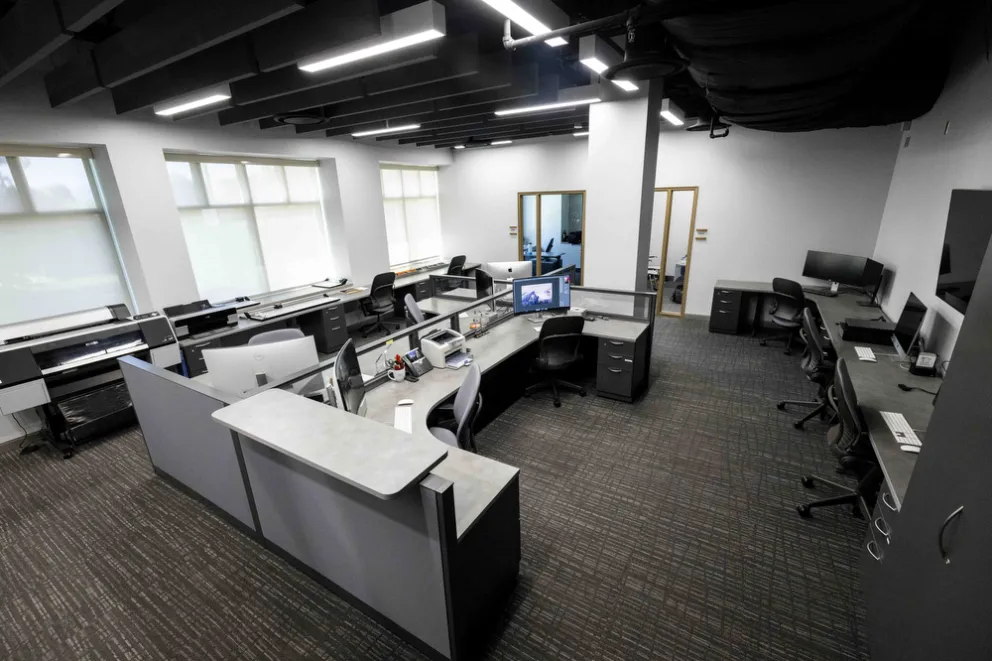
(photo by Brooklynn Jarvis Kelson) The student work area. The print-handling area is on the left and the large TV is on the right edge of the photo.
We have space on the wall for our large-format printer and counter space dedicated to trimming and mounting prints. Nate and I also have private offices that are right off the student space, so we can still be near the students but have the option of closing the door when we need to work with clients or finish projects. We installed sound dampening panels in the ceiling to make the whole space a bit quieter.
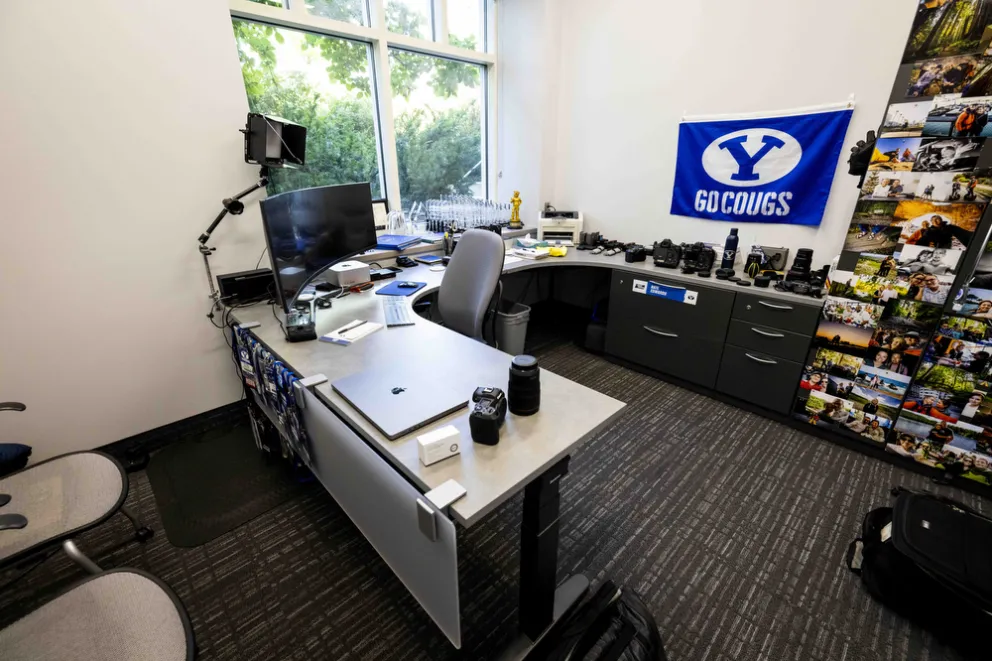
(photo by Brooklynn Jarvis Kelson) Nate's office.
We have several large windows with thick shades so that we can keep the office dark. The LED lights are daylight balanced and the carpet, desks and ceiling panels are all done in neutral gray to minimize any color casts for our editing workstations.
Portrait Studio
We’re tasked with photographing all the full-time employees on campus so we capture thousands of portraits every year. Our goal with the official university portrait is that a portrait taken today will look exactly like one taken 3 years from now, so consistency is paramount. I wanted to have a permanent portrait studio dedicated to this task so we could continue to capture portraits regardless of what was happening in the large studio. On the right side of the portrait studio is a structural support beam that couldn’t be moved, so we needed to have a wall there, which is why I thought that it would be the best space for the portrait area. It measures 8 feet wide by 15 feet deep, The only challenge with the space is that it is a bit narrow.
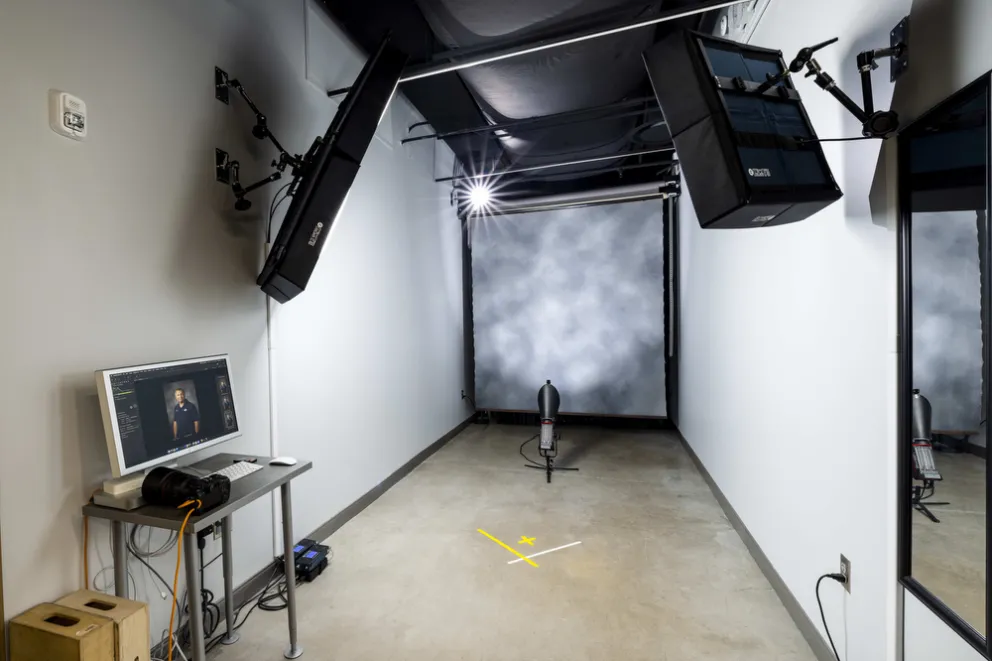
(photo by Brooklynn Jarvis Kelson) Portrait area.
We decided to use continuous LED lights in the portrait area, the reason for that is mostly selfish. It is so that the students editing in the office area won’t be bombarded with the constant flashes of lights from the endless stream of portraits. We use Aputure 300d Mark II lights for the background and hair light and Intellytech LiteCloth LC-160 LED Panels for the key and fill lights. The reason I use the LiteCloth panels is that they produce a bright but soft light and they have a very shallow profile, which makes them narrow enough to fit inside the space. The lights are mounted on Impact Wall Plates to remove the need for bulky light stands, which helps keep the floor free of clutter.
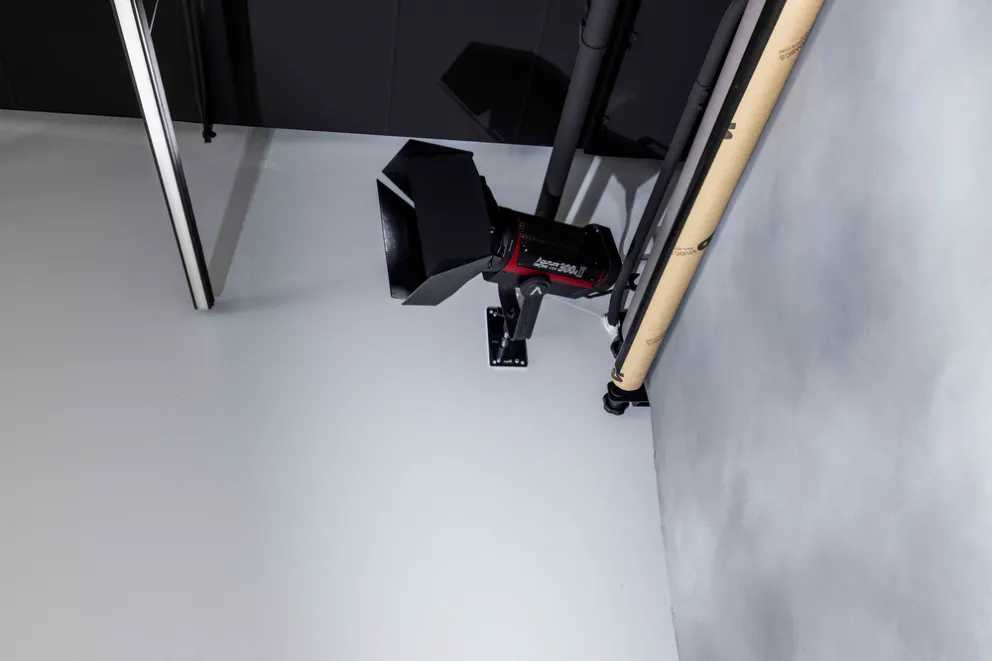
(photo by Brooklynn Jarvis Kelson) Wall-mounted lights keep the floor clear.
We welded a set of Manfrotto background holders onto a metal plate so we could side mount them to the wall. Behind the backgrounds, we have a small storage area for large format printing supplies and other misc. office supplies.
Conference Room
In the Harry Potter series of books and films there is a room in Hogwarts Castle that constantly changes to fit the needs of the moment, which is exactly what our conference room is to us. The space measures 13 feet wide by 21 feet deep. Some days it's a green room, others it is a conference room and sometimes we set up backdrops and photograph portraits in it. It leads directly into the studio so it is usually used as a green room, but we have a garage door that we can use close in case we ever need to separate the spaces. Everything in the room is modular, from the fold-up tables to the stackable chairs and the leather couch that sits on sliding casters. We also have a 65-inch TV mounted on the wall that can entertain clients or display the photos being captured in the studio.
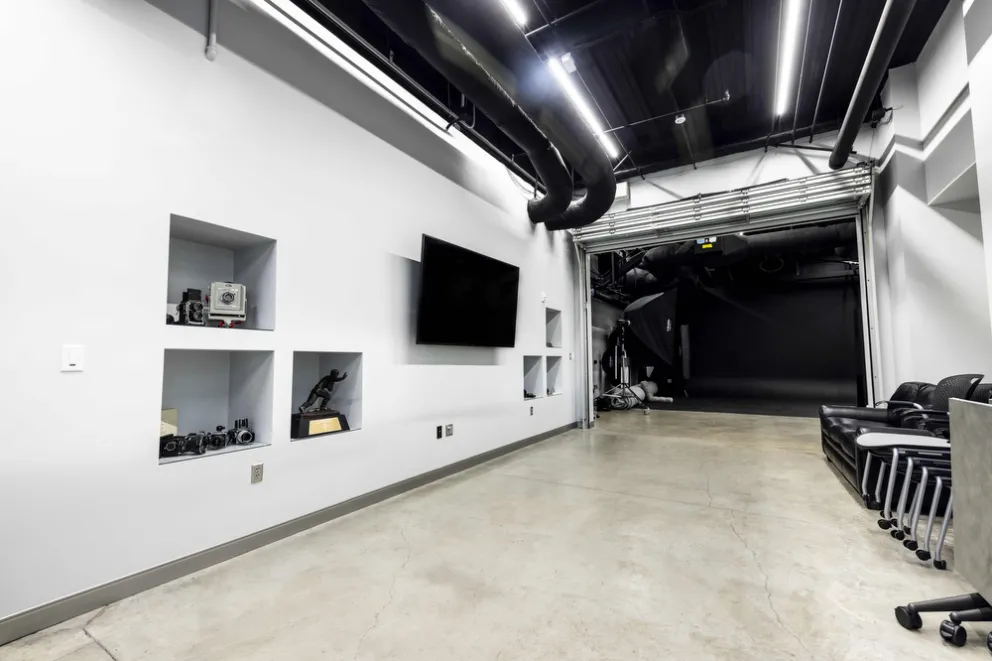
(photos by Brooklynn Jarvis Kelson) The conference room/green room/flex space, looking toward the office area (top) and studio (bottom).
We also have some cubby holes on the wall that we use to display the history of BYU Photo. Every camera and piece of gear on display was used by our office at one time or another. Each shelf represents a decade of our history, and each one tells a part of our story. It's really fun to show off some of the old Hasselblads, developing tanks and light meters to our clients and visitors.
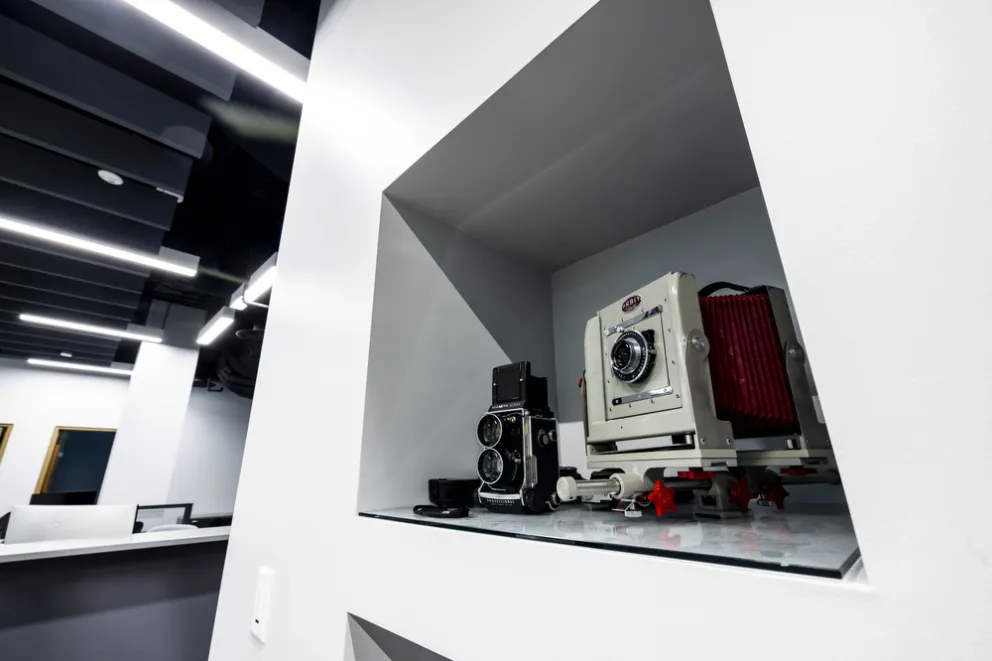
(photo by Brooklynn Jarvis Kelson) These cameras are so old they were probably used in the 1900s.
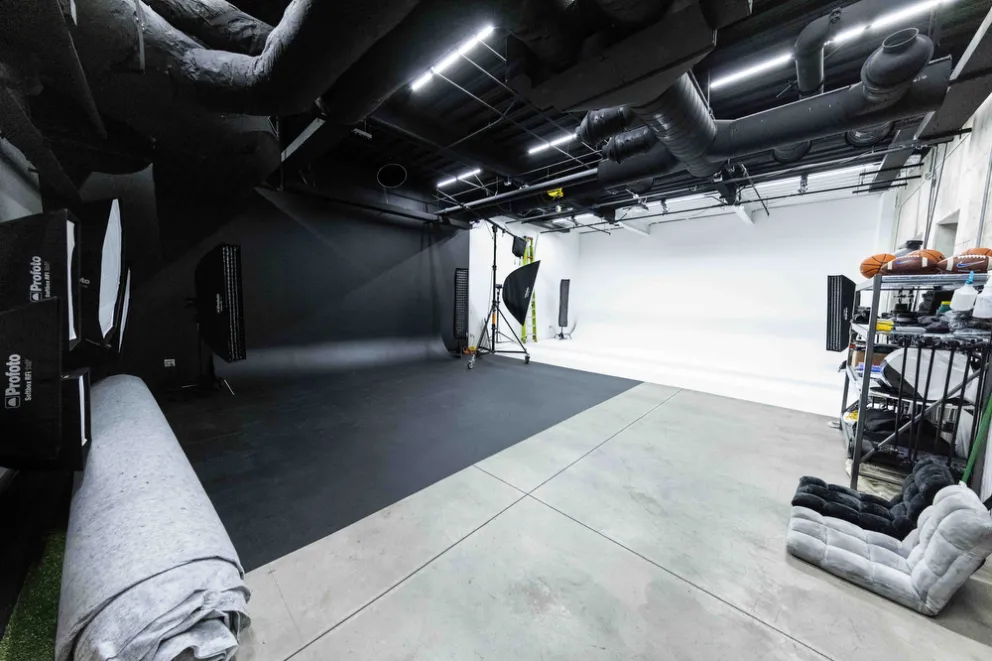
Studio
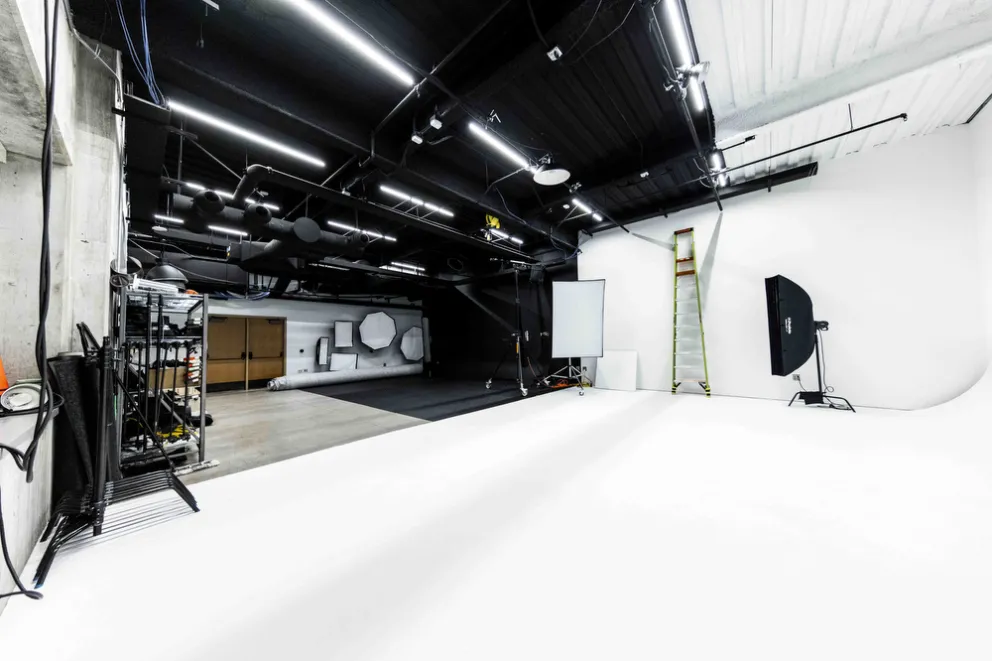
The main attraction is the studio, it measures 29 feet wide by 47 feet deep, which is 1,363 square feet. Early on I decided to install double the amount of power outlets over what I thought I might need, so we have 22 plugs in the studio with an additional 11 in the ceiling space.
We made sure that the architect and the electricians overbuilt the electrical grid for our unique power needs. We sent them the electrical specs for our lights and had them install high capacity breakers to make sure that we couldn’t overwhelm the system.
One of the best features of our studio is the 14 foot tall ceilings. We wanted to maximize every inch of the height, so we had to reroute cable trays, fire sprinklers and HVAC ducts in order to keep it as open as possible. We also installed several mounting bars in order to permanently mount lights directly above the subjects and the backgrounds. The ceiling power outlets are installed next to the mounting rails.
(photo by Donovan Kelly) The 29-foot wide white cyc.
The main wall is dominated by our 29’ wide white cyc, which is the Procyc System Super 2.5 EZ Cyclorama. The cove is 30 inches tall and it makes for a great infinity wall background. Originally we wanted to build it into one corner, but we would have had to sacrifice so much width that we ultimately decided that it wasn’t worth it. We painted the ceiling above the cove white for when we need to shoot low angle shots. There are 3 lights permanently mounted in the ceiling that only light up the cove and the wall.
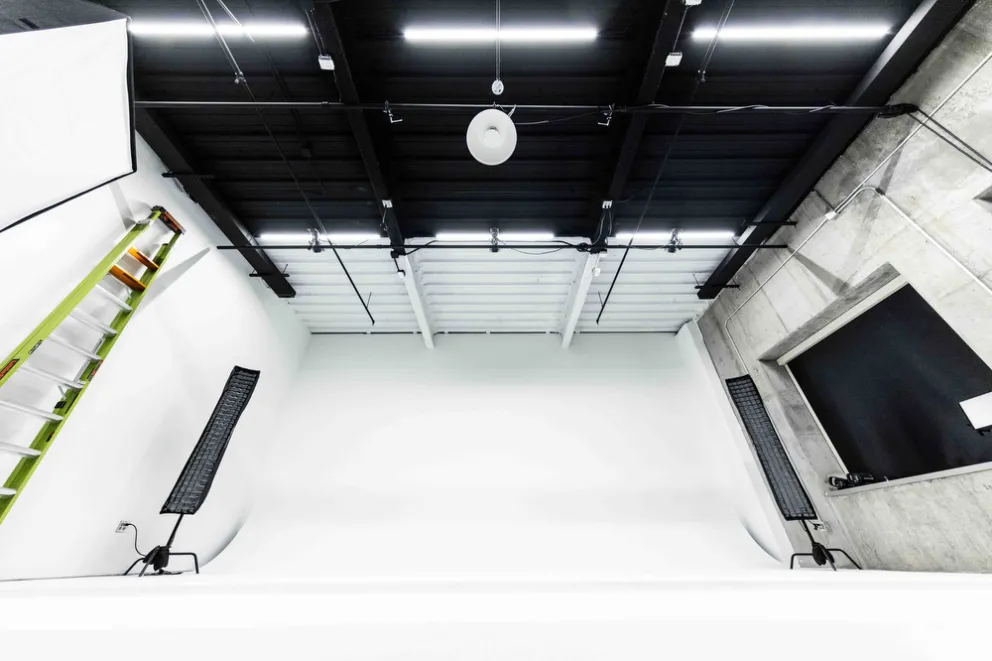
(photo by Donovan Kelly) The 29-foot wide white cyc, showing the white ceiling and ceiling-mounted fixtures and outlets. On the right you can see the blackout curtain on one of the windows.
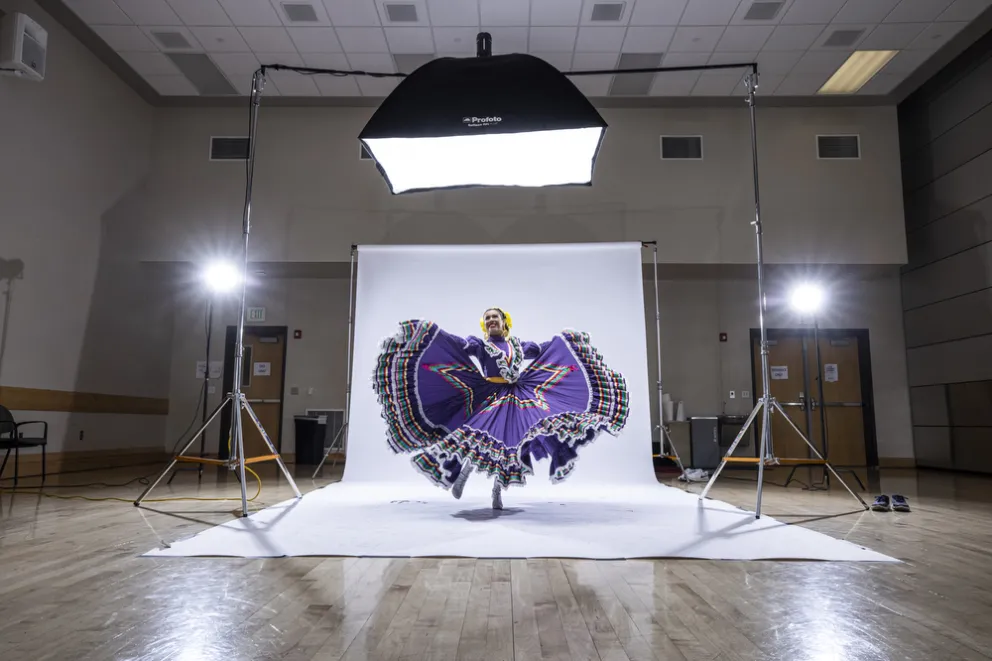
When we use the entire length of the studio we can shoot against the wall from 47 feet away. I love the fact that I can capture large group photos, dancers in formation and athletes in action all in the same space.
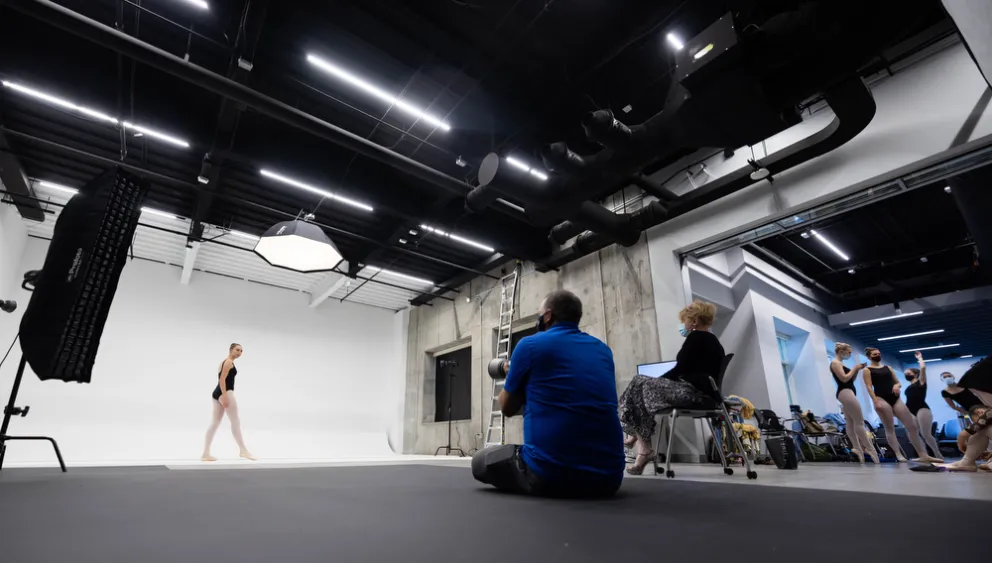
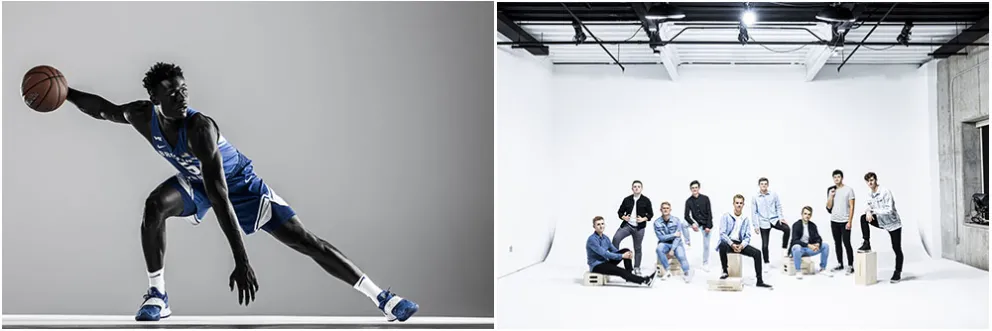
(photos by Nate Edwards) Top: Jaren photographs a dancer while others use the conference area as a green room to get ready. Bottom left: A single athlete in the white cyc area--no need to pause for Karate class! Bottom right: 29-feet wide gives a lot of room for group photos as well.
Along the other wall we planned to install a seamless roll paper holder so we could put up a bunch of different colors of paper. At the last minute I decided I wanted to do something I’ve never seen in a studio, a black cyc. I love shooting dancers and athletes on black backgrounds so I added a 16’ wide cyc to our design. It turns out that our graphic designers love it, especially when we are photographing athletes. Most of our athletic marketing images are cut out for the myriad of social media posts and posters. The designers tell us it is much easier to cut out our uniforms from the black background vs a white one, plus you don’t have to deal with any color cast in the shadows like you do with a green screen backdrop. 75% of our studio photography is done against the black background, which is nothing like I expected when designing the studio.
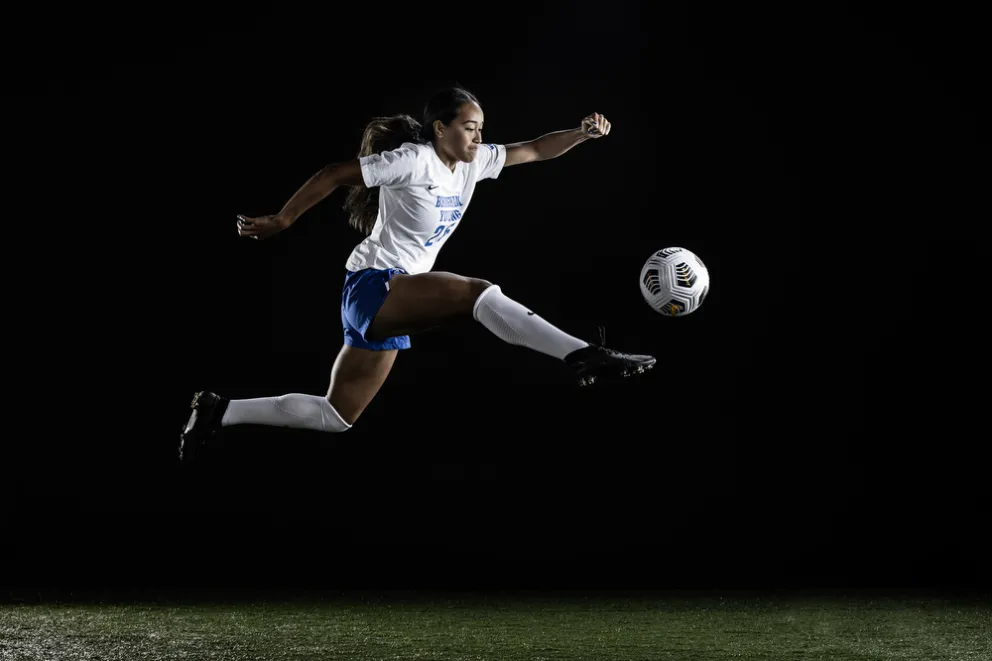
(top photo by Brooklyn Jarvis Kelson, bottom photo by Nate Edwards) The black cyc was a surprisingly useful decision.
We only use Profoto lights in the studio, 2 Pro 10 Packs with ProTwin Heads heads and 14 D2 Monolights and almost every single modifier Profoto makes. With the Profoto Connect Pro remote I can control 6 zones of lighting over 100 channels. With the remote I can adjust power levels on each zone, turn on and off the modeling lights or turn on and off each zone without having to leave my shooting position. It makes it easy to control our ceiling mounted monolights and negates the need for an assistant to constantly be adjusting power levels.
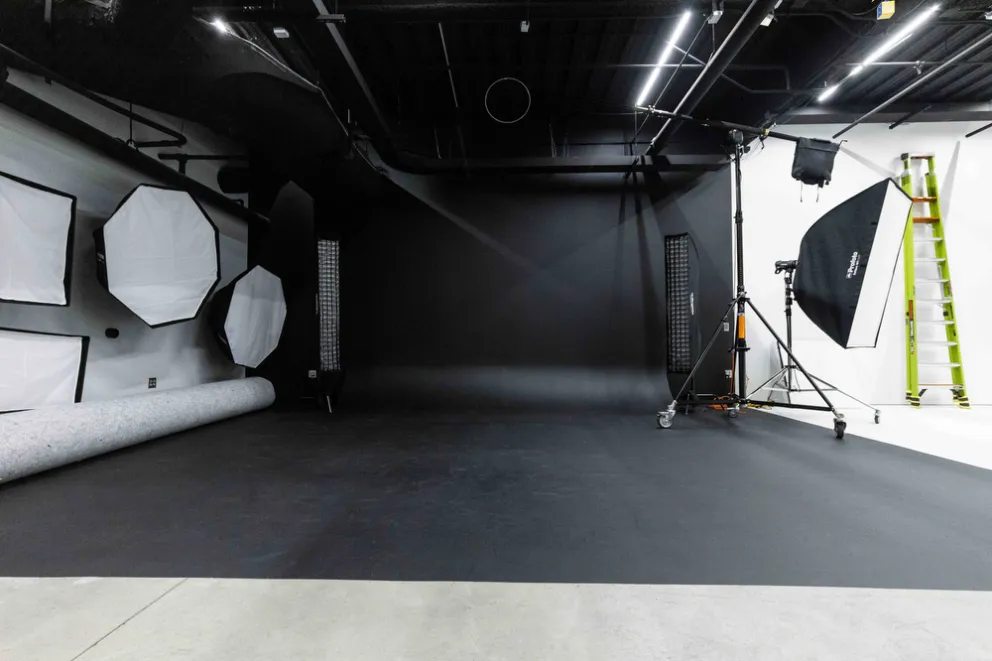
I want my modifiers to be ready at all times, so Nate created a bunch of mounting points on the wall made out of 4 inch PVC Caps. They work perfectly with the Profoto mounting system so that the softboxes we are not using are mounted on the wall.
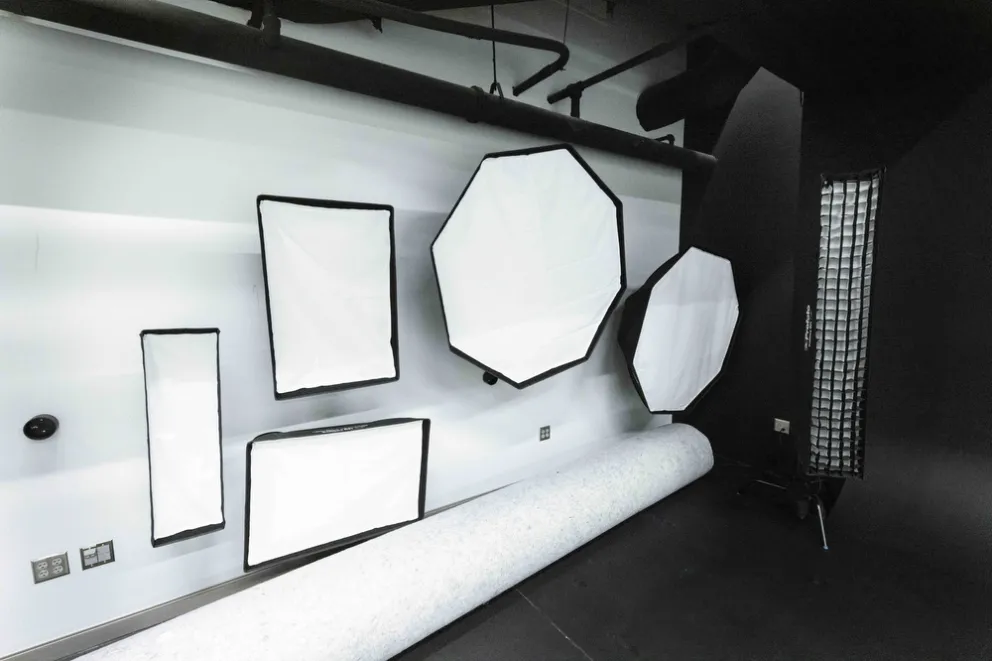
(photo by Donovan Kelly) Modifiers ready to use but off the floor when not needed.
In the studio we always shoot with a wireless tethering system. We transmit jpegs automatically to an iPad Pro through the Shuttersnitch app so that photographers, designers and clients can see every image we capture instantly. We also cast the iPad to one of two TVs via Apple TV, either the large 65-inch TV on the conference room wall or a 40-inch TV on a rolling cart. The wireless tether helps us to be more efficient during our shoots, and the clients love it.
We’re very happy with how the studio turned out and how efficient it allows us to be. Instead of finding locations and trying to make light stands fit in elevators I can focus on capturing images. If I need to take several days to photograph a team I can just leave the lights setup in the studio and I’ll never have to wait for the karate class to finish.
Visit BYU Photo's Youtube channel for a video tour of the BYU studio.
************
"Adding new hardware to the doors in my house has really helped me get a handle on things." Thanks for reading the blog. Article submissions or suggestions are always welcome. Email editor Matt Cashore, mcashore@nd.edu. And, as always, if you don't already, follow UPAA on Instagram!