UPAA Blog 2023-24 #3 10/10/23 (Text and photos by Jason Halley)
Who are you?
I'm Jason Halley, I am currently the lead university photographer for California State University, Chico; a position I’ve held since 2014. My photography journey started 22 years ago when I joined a high school photography class. Since then, I’ve never put the camera down, even during vacations. . I often say I don’t provide photographs, but rather create memorable experiences. We try to leave our subjects with a positive impact that they’ll leave a photo session not worrying about how they look, but rather how we made them feel. I started as a photojournalist but have challenged myself into a whole new creative approach through my work as a university photographer.
How did you do that?
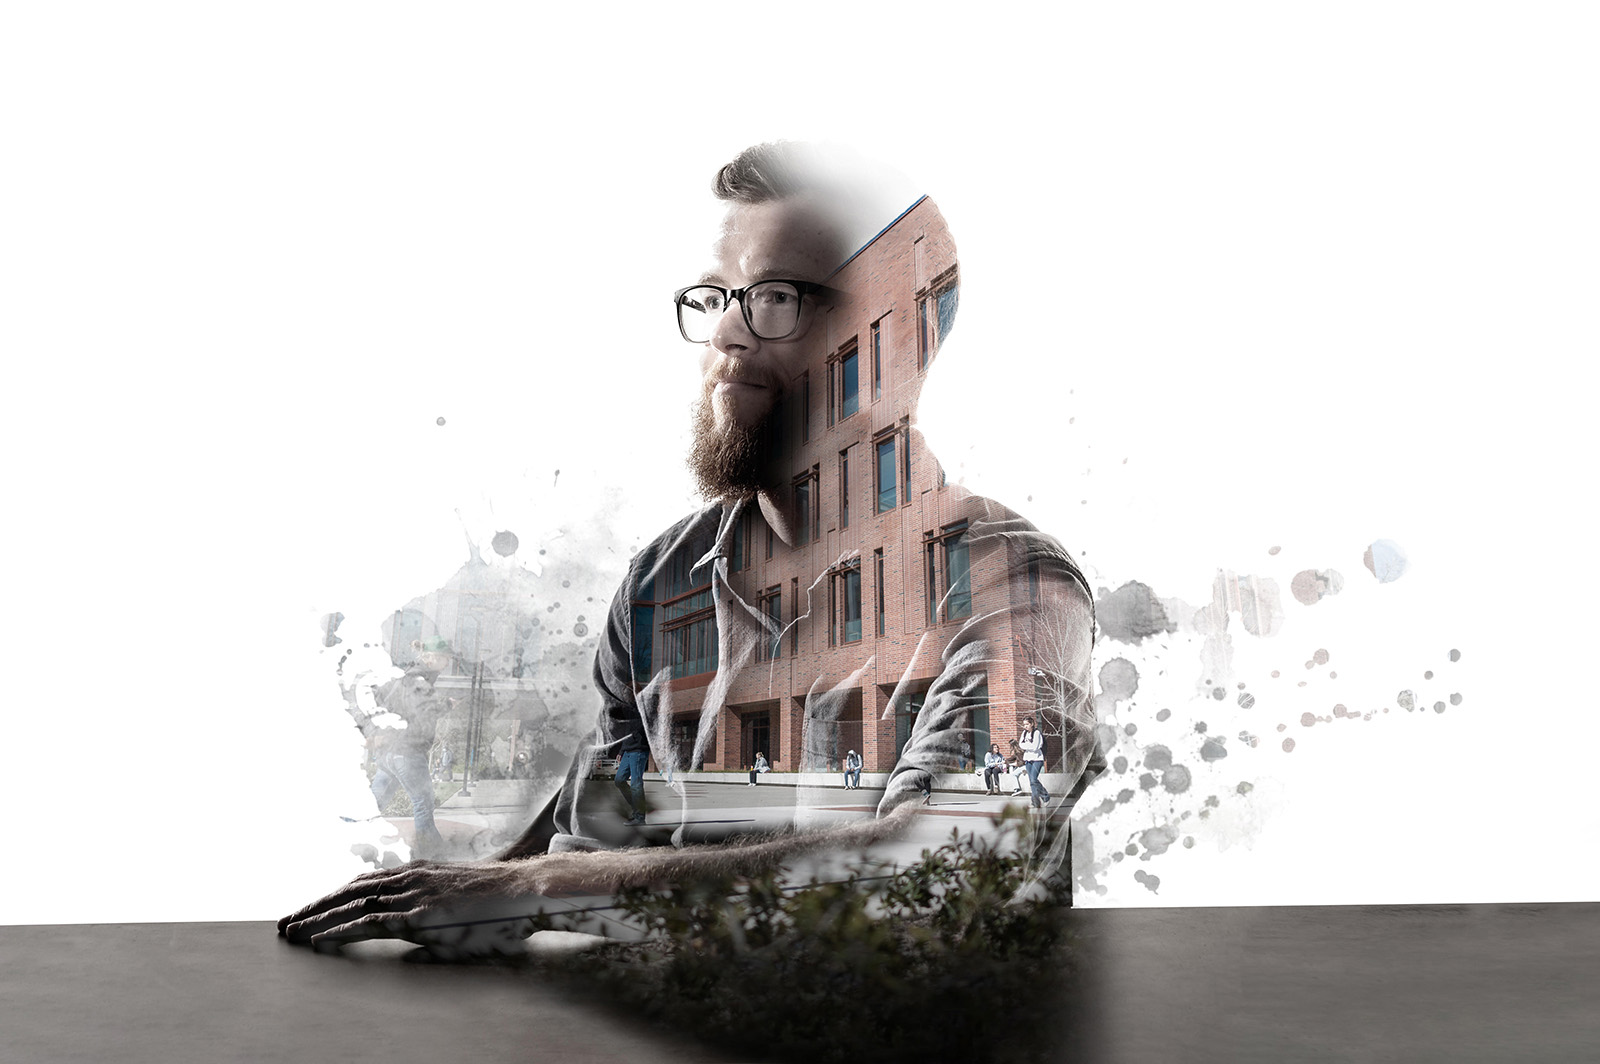
The final illustration is a post-processed double exposure from a studio portrait image and a second photograph of one of our campus buildings. The settings for the studio portrait are below:
Camera Model: NIKON Z 6_2
ISO: 100
Aperture: 4
Shutter: 1/160
Lens (mm): 50
Sequential Images: 25
Lighting:
(2) Profoto B10 for edge lights (camera left and camera right)
(1) Profoto B10 with Westcott Optical Spot modifier
(3) Dynalite MH2015 for white background
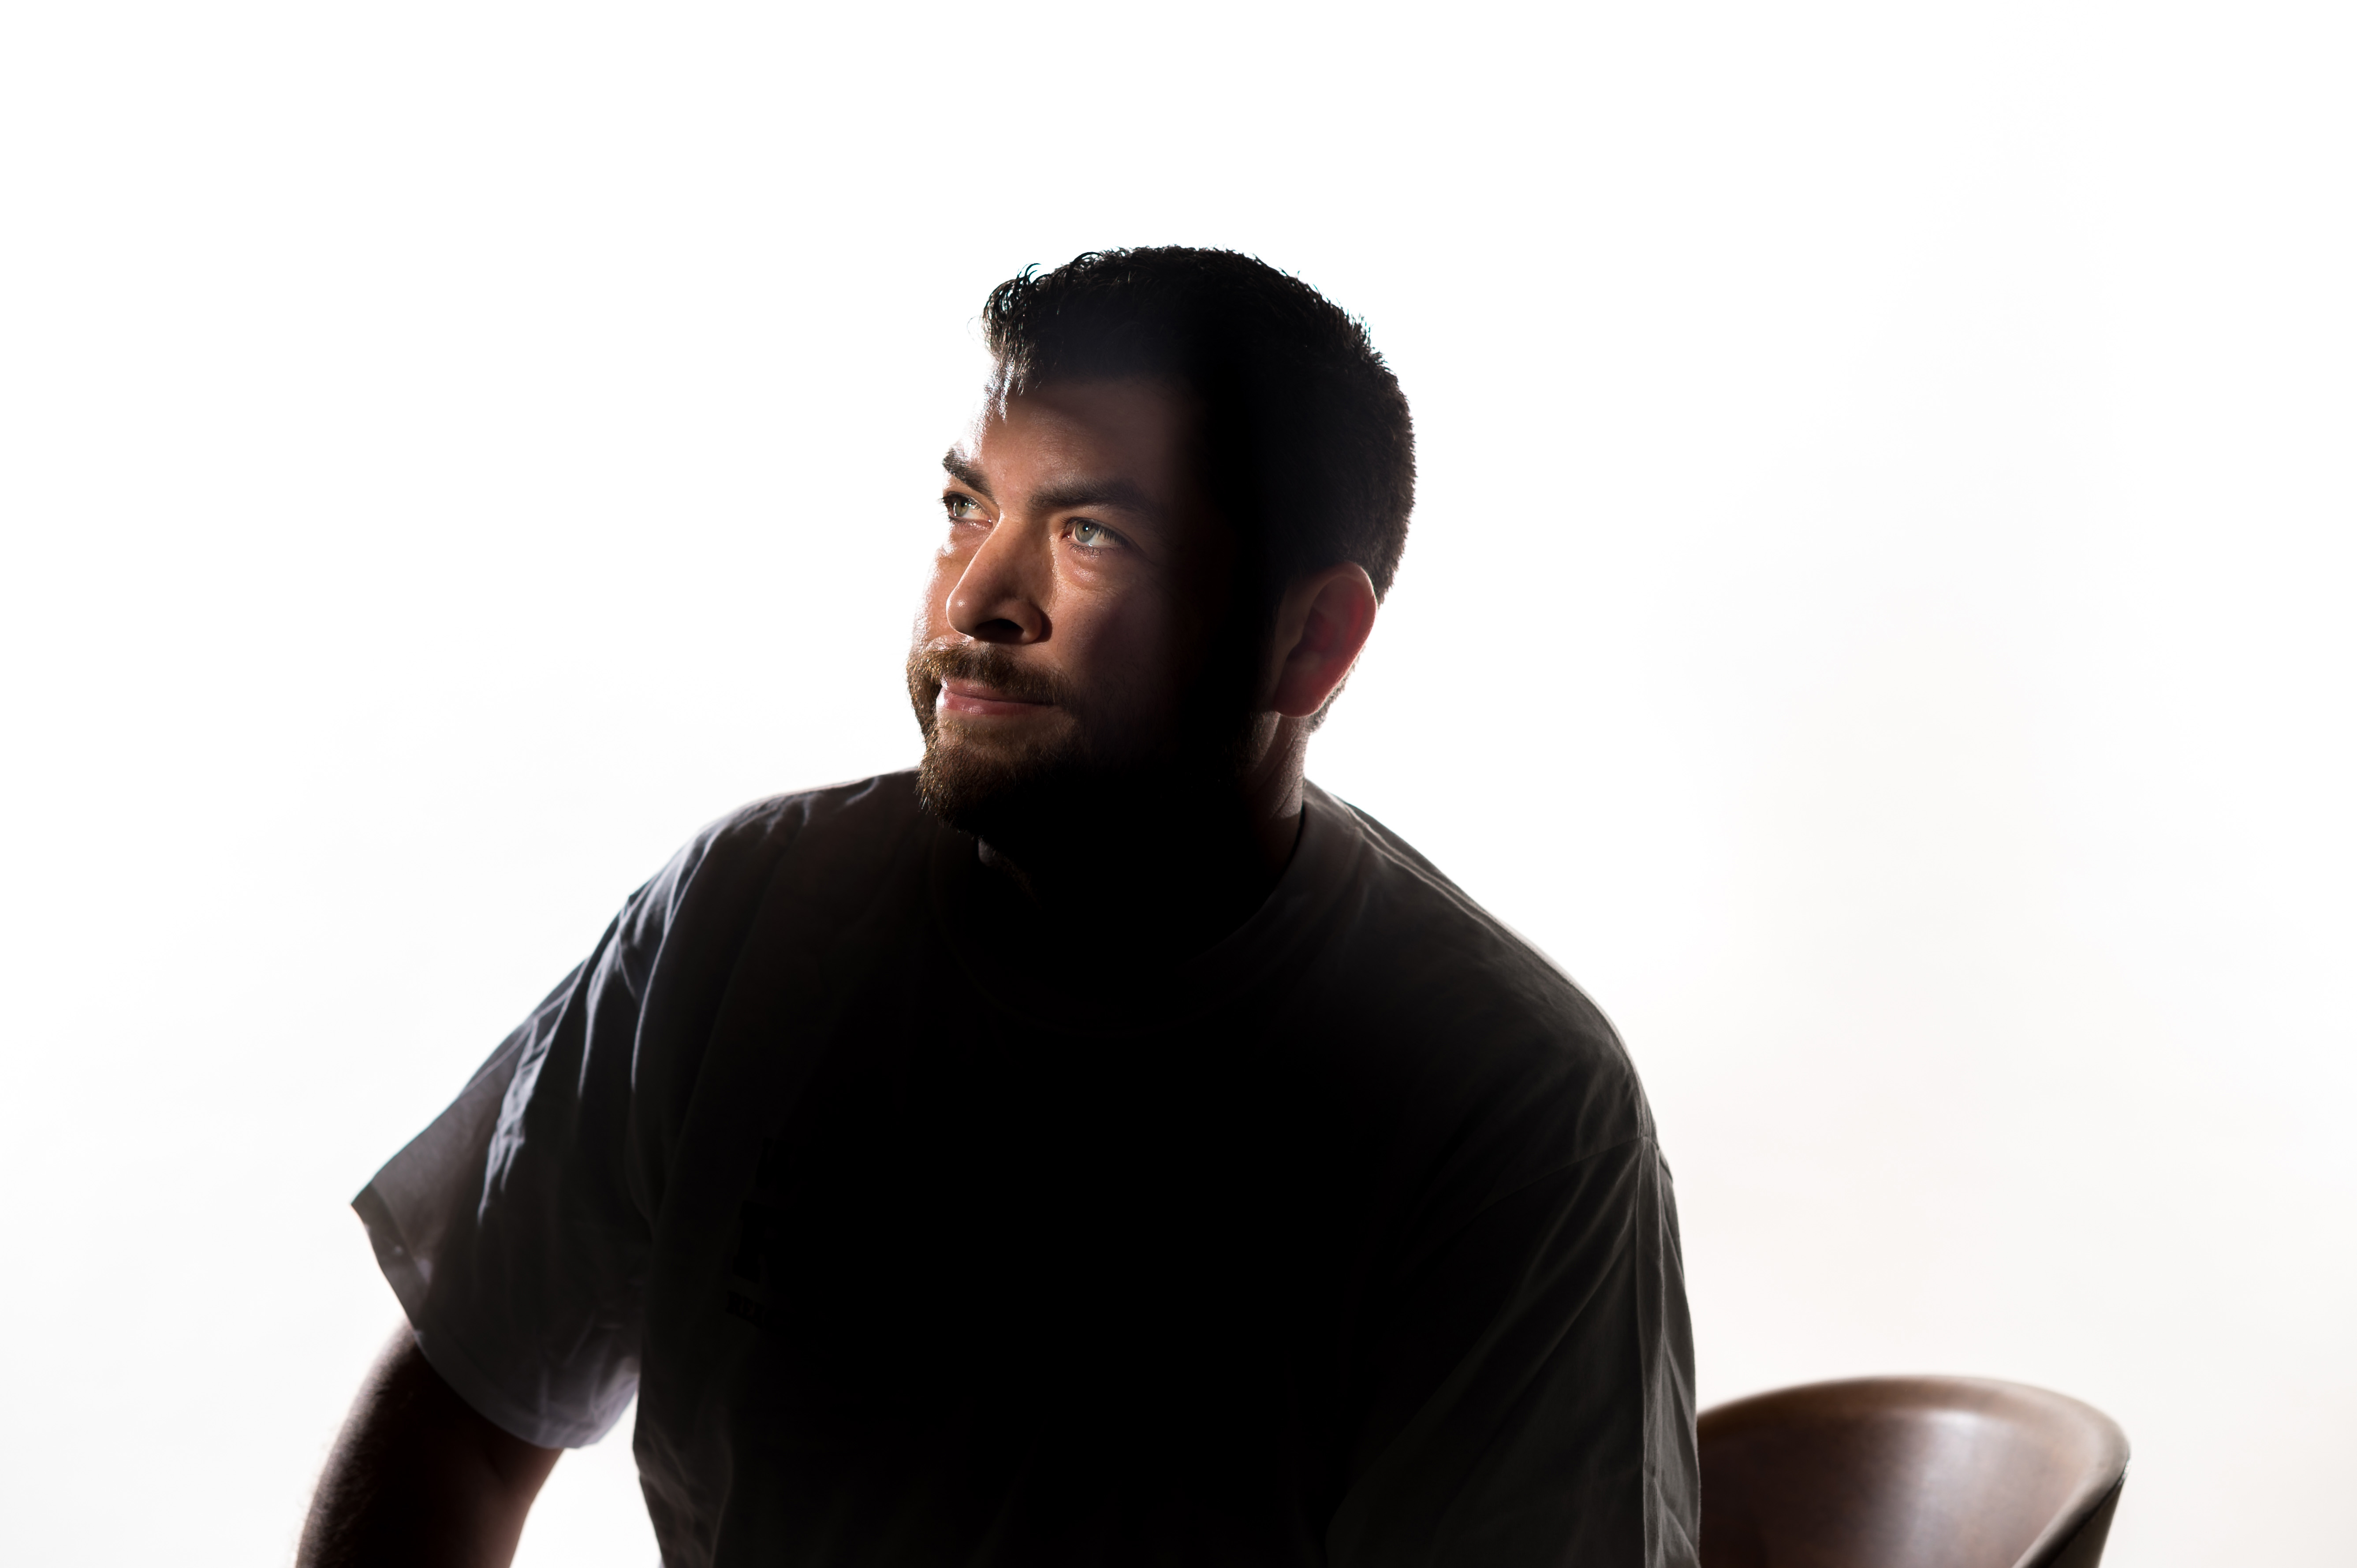
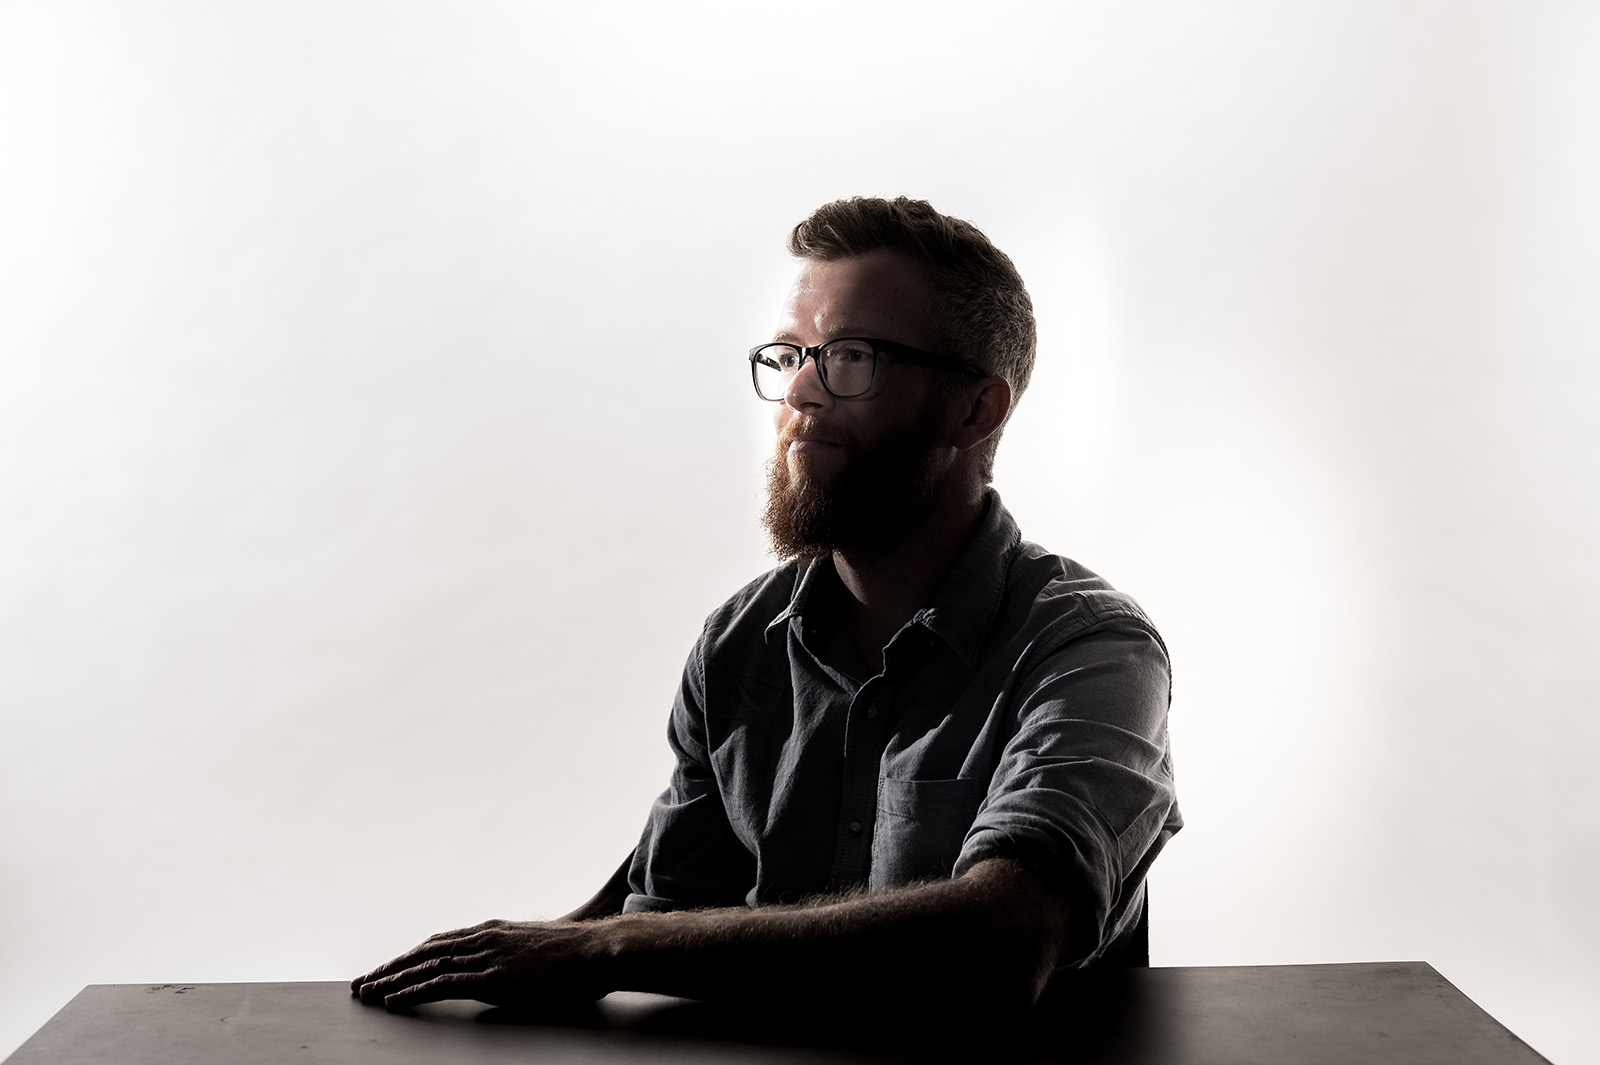
I used an online tutorial to overlay a second image over the portrait. In lighting the studio portrait, I knew that the highlight and shadow regions would act like a layer mask, just in the opposite effect. The regions that would be bright would not reveal the underlying layer, and the areas that were shadowed would show the underlying layer. Keeping this in mind, I captured the portrait on a white background with the subject intending to be in the shadow except for a slight edge light. I also wanted the face to be seen, so I used an optical spot to light the face of the subject.
What was this photo used for?
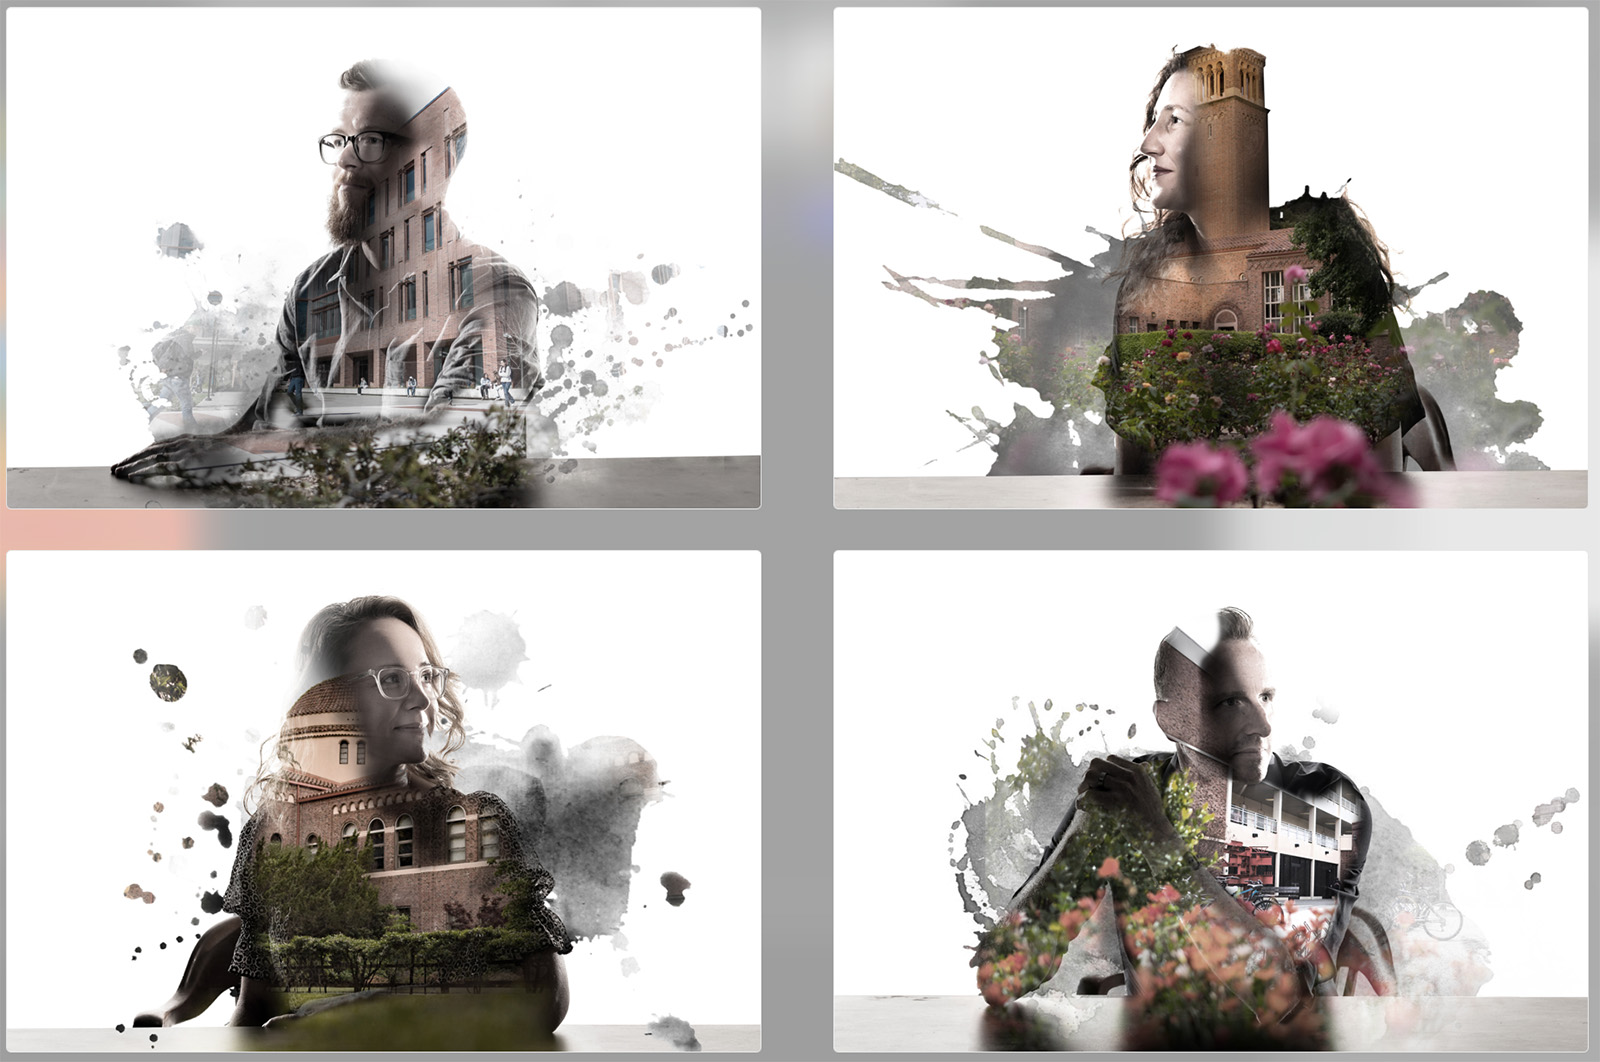
This image was part of an annual creative series that introduces the new faculty cohorts each year. For the last 8 years I’ve challenged myself creatively to create some new theme or set design that creates a playful and unique way of sharing a bit of personality of the faculty. I take advantage of the fact that they are new to the campus and are just following any direction that is given to them. For each of the shoots, they do not know the theme or concept of what they’ll be asked to participate in other than a “creative portrait”. The unprepared timing of the portrait session creates a genuine expression of their personality in the images. They don’t have time to overthink it. The spontaneity is also in part due to me usually figuring out what the concept is the night before. Many different concepts may look good in my head, but when it comes to executing the idea, it can be more challenging.
You can view previous year’s new faculty concepts here:
2023-2024: https://www.flickr.com/photos/chicostate/albums/72177720311114773
2022-2023: https://www.flickr.com/photos/chicostate/albums/72177720301383021
2021-2022: https://www.flickr.com/photos/chicostate/albums/72157719727837478
2020-2021: https://www.flickr.com/photos/chicostate/albums/72157719782738475
2019-2020: https://www.flickr.com/photos/chicostate/albums/72157710508518353
The photos are shared with the departments of each new faculty and our Faculty Development (FDEV) department. FDEV will promote them on their website and other promotional materials. At times, our University Communications office will write features of the new faculty with an accompanying photo.
Was there an inspiration for this shoot?
This specific concept has been in the works for a very long time. I’ve seen various “double exposure” tutorials across the internet for many years, but never applied the technical merging of the double exposure concept to any assignment.
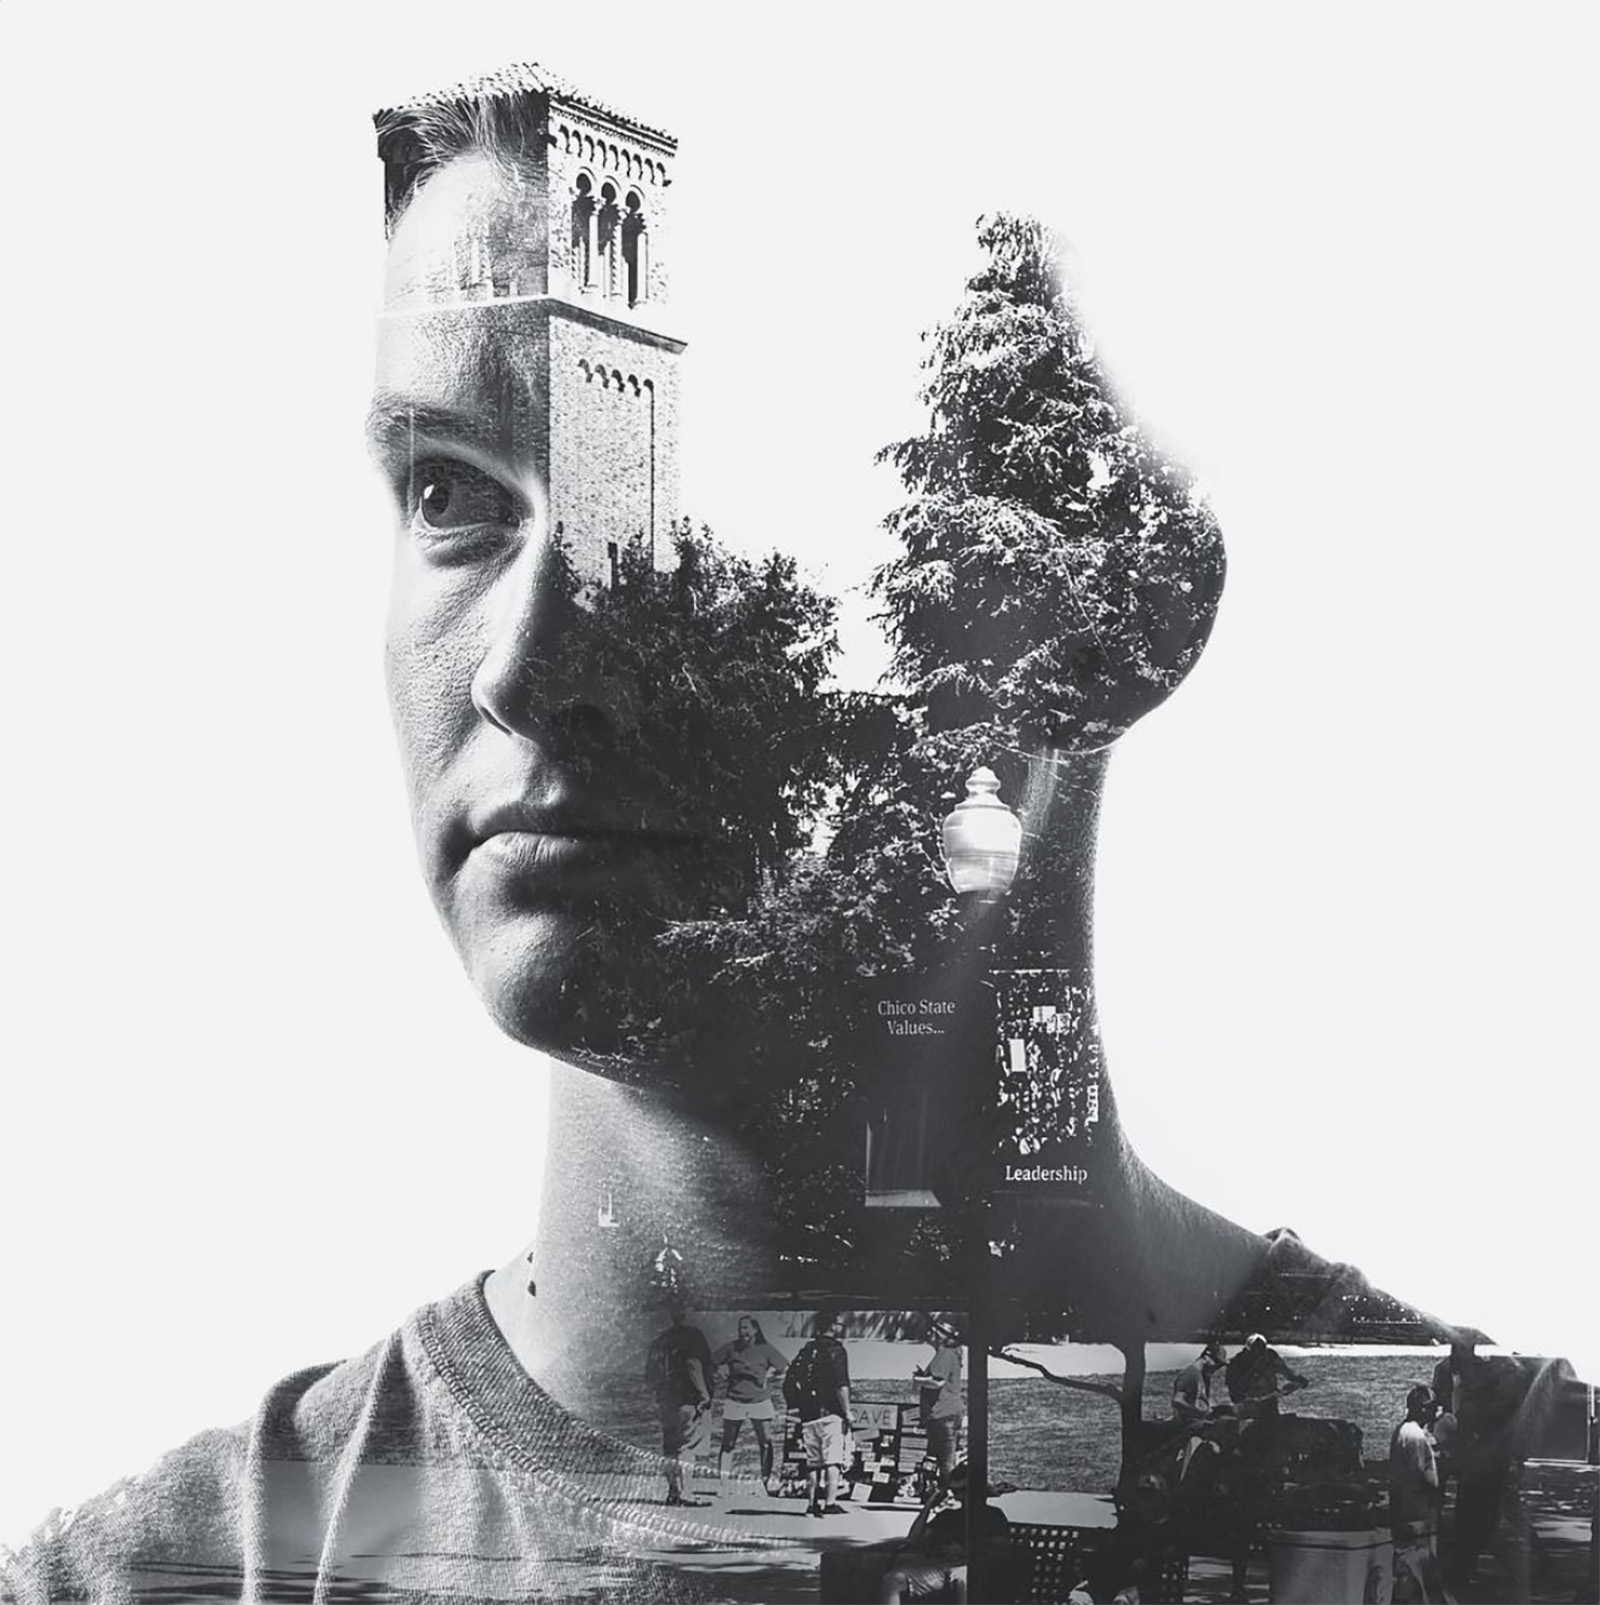
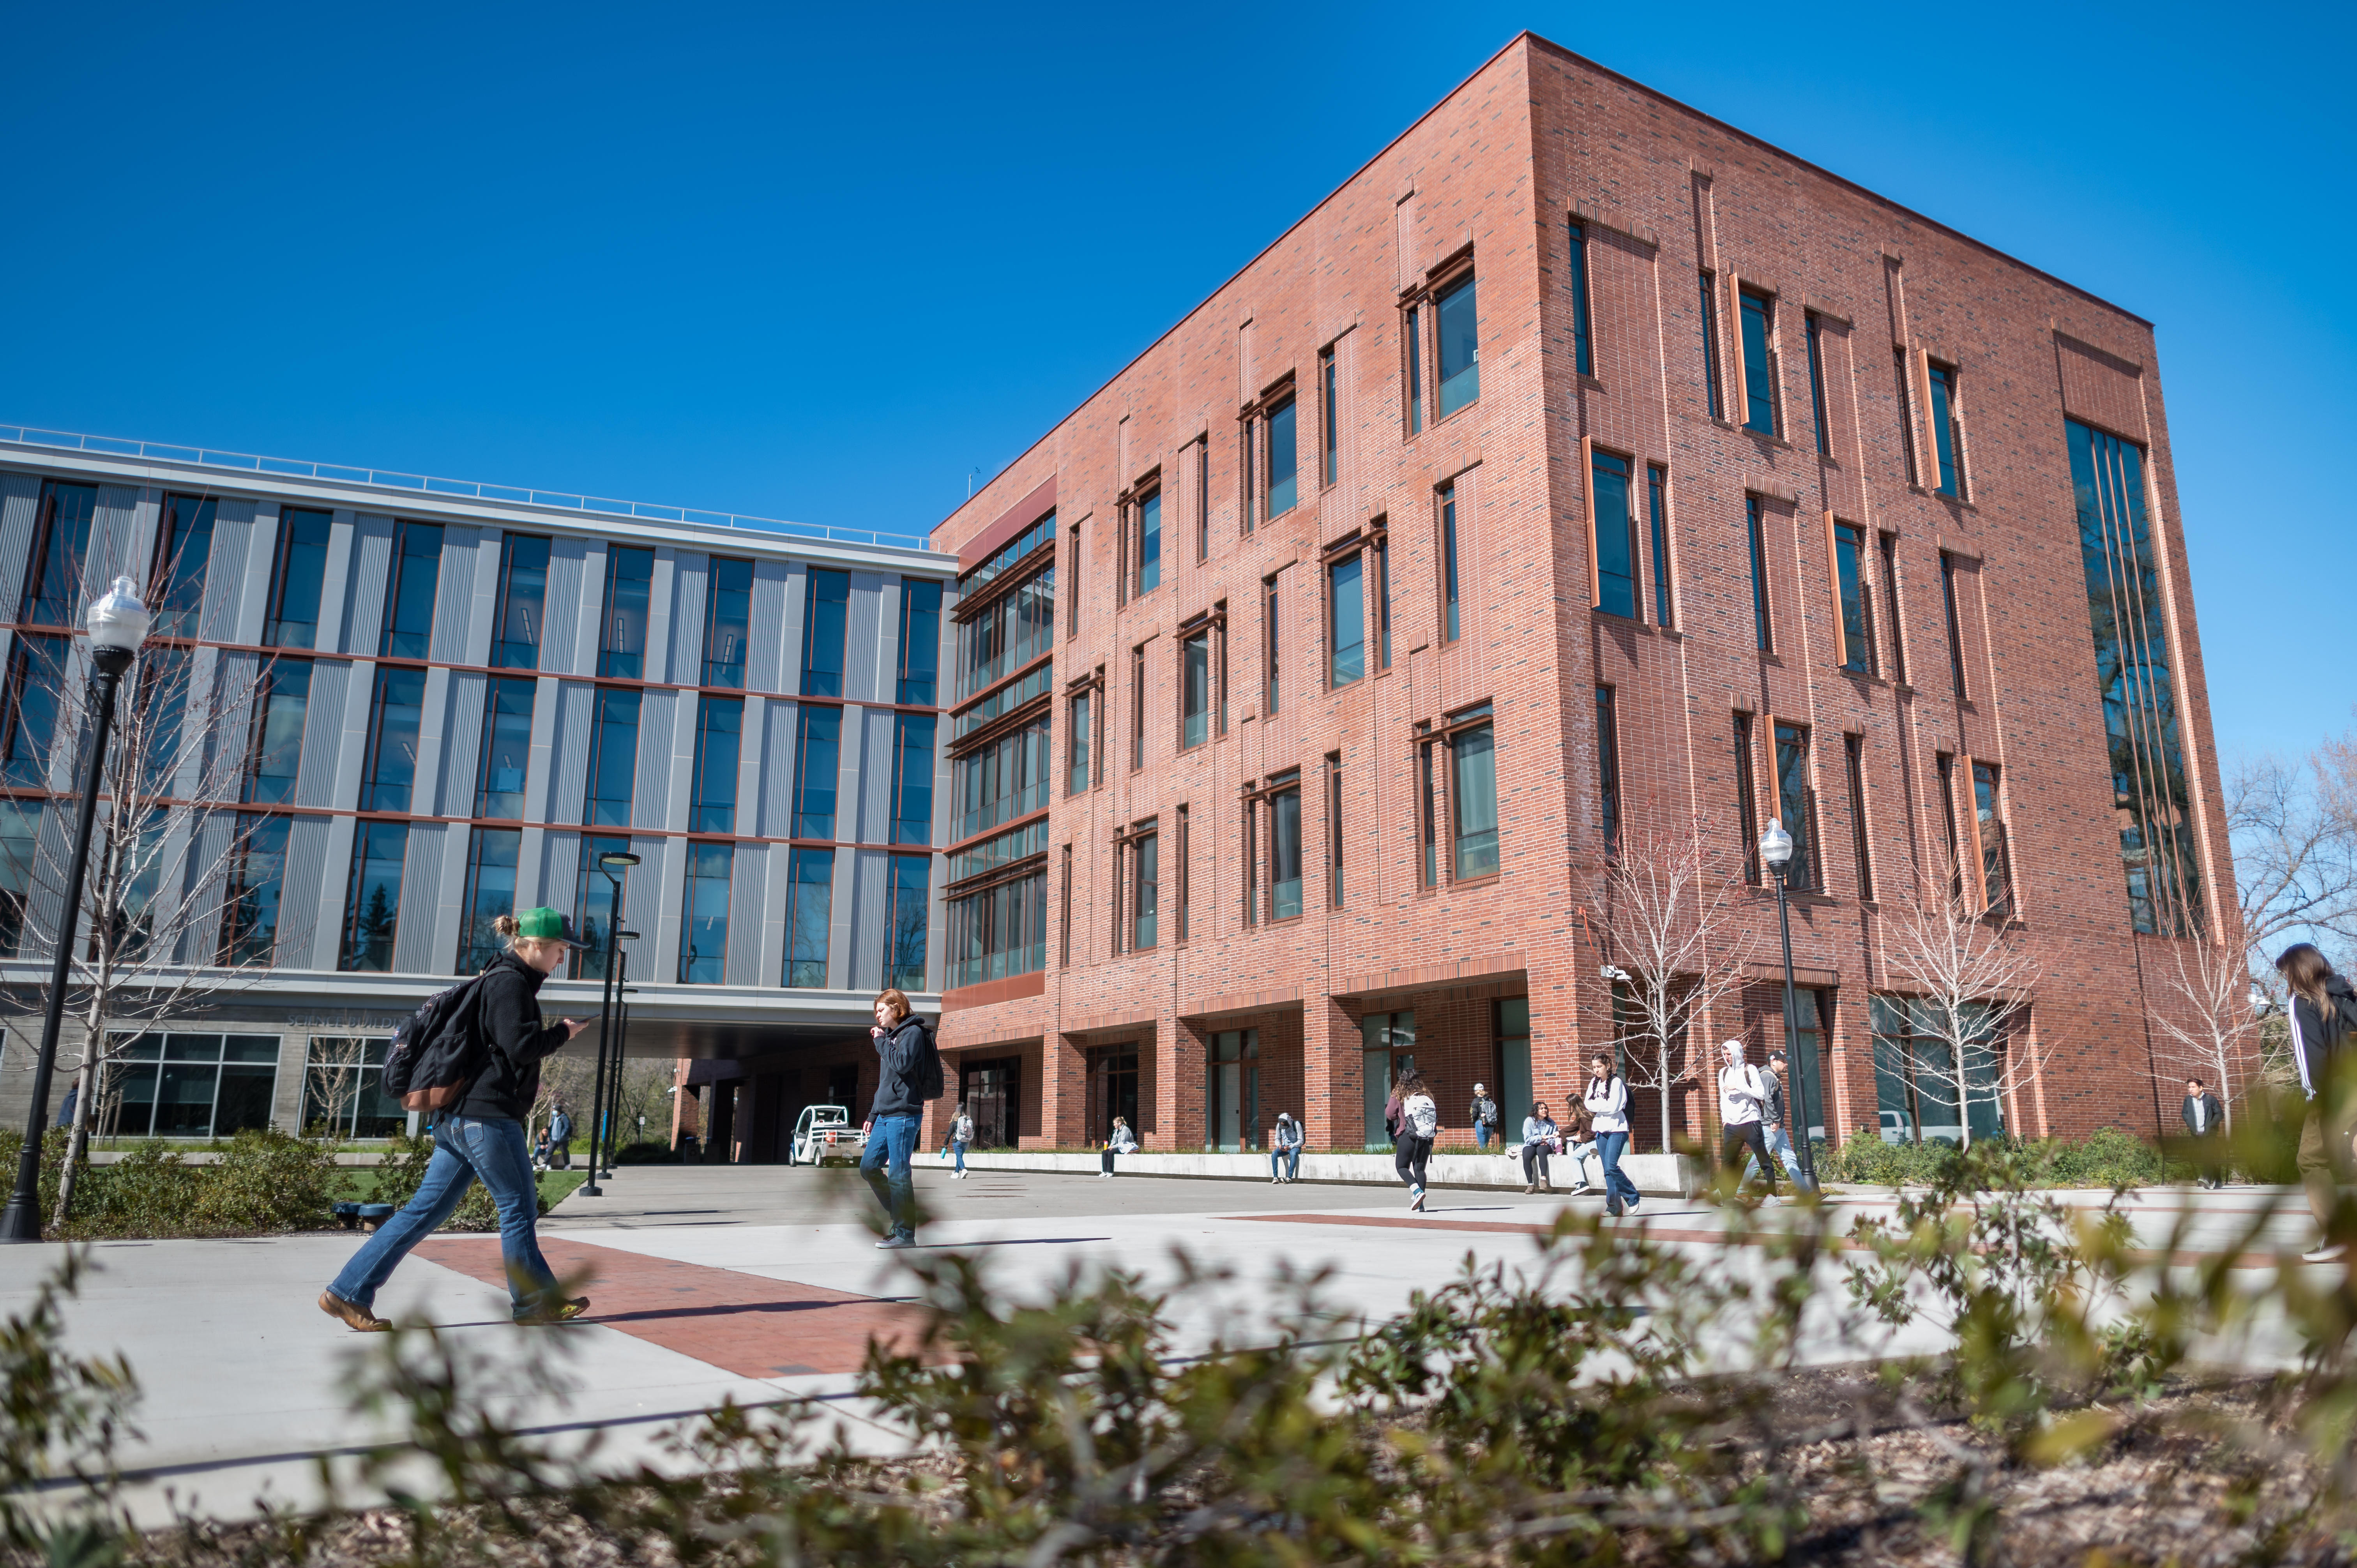
In 2017, I tested the concept with a former student photographer. The image came together very well, but there were many lessons on how to make it look just right. The biggest challenge was considering what would be the image that I was overlaying on the portrait. I knew I wanted an image of the campus to overlay on a portrait, but finding the right image was the most challenging part. I learned that images that had an open sky of the landscape worked best to allow the merging of the layers to align with the edge of buildings and trees. This seems to be a quite difficult task as our campus has quite a lot of trees that are very tall.
There was something unique about merging the campus imagery with the new faculty. It creates a sense of what our campus means to those that work here. One of our main features is the beauty of our older brick buildings and how our campus community embraces the sense of place. The double exposure concept emphasizes the connection of the subject and the location.
What kind of help did you need?
With many of the new faculty photo shoots that I attempt each year, the thing that helps me the most is being alone in my thoughts to think creatively and spend time tinkering with the gear to see what can work or not work. I find that the process can be hindered when I have others offering their ideas or guidance. It’s a journey that I must take myself to work through the creative blocks.
For this specific image, I was happy to have the new faculty be fully committed to supporting my idea. I know it’s not easy to sit for a highly creative portrait and trust the photographer that the result will be something that isn’t cheesy or misinterpreted.
Our second university photographer Matt Bates provided a critique on the editing choices and was a soundboard for my rambling ideas when trying to develop the concept. I also talked through the process with our web designer Francie Divine relying on her critical feedback. It’s helpful to have some positive criticisms that allow me to refine the details.
What were the technical difficulties to overcome?
I spent quite a bit of time testing out various lighting arrangements to get what I thought would be the best portrait to hide and reveal the second image that would overlay the portrait.
Knowing the technical approach of the double exposure was something that I had to learn from YouTube tutorials. There’s several online, but this one by Aaron Nace of PHLERN.com https://www.youtube.com/watch?v=VCQgR5czjZA is a quick and easy approach that I worked with. After watching the tutorial several times, I had to make it work with some of my images. Alignment was a big challenge. The double exposure is not a simple overlay. It is a double exposure, but the second image has parts that are revealing or hiding as part of the edges of the landscape.
My first attempts did have a basic image, but it felt very “placed over” the portrait instead of what I wanted it to have a feeling of being brushed in. I spent some time thinking about how to better “blend” the second image over the portrait. I attempted revealing the overlaying image with brush strokes, but they didn’t feel quite right. I ended up settling on some splash brushes that I could apply which gave the effect of water drops revealing the image within. This gave a better blend to the double exposure of how the overlaying image was being revealed.
There were several iterations of the splash brushes which at first felt very busy. I toned it down and gave it less intensity. Ultimately, I found a good balance that the reveal of the second image felt more natural and pleasing.
Would you approach it differently if you had to do it again?
I likely complicated the photo shoot more than it needed to be. I was too concerned with the Portrait Lighting of what was lit and what was shadowed. I assumed I would want a slim line of light across the face and most of the rest of the portrait to fall into the shadows so that the overlaying image would be revealed. When I was in the editing phase, I realized that having a bit lighter on the face would still have been helpful. Also, I didn’t need to have as much shadow area on the body. Having a bit of detail in the clothing does help with the blending the two images.

Did anything stand out to you during the shoot?
What I love most about the new faculty portrait sessions is the enthusiasm from the faculty themselves. They come in with no expectations and I give them such a unique prompt, but instead of whining or being difficult, they jump right in with supportive energy. It is really their willingness that makes these efforts work. Without their trust in the creative process, the images would not be successful. It’s a unique partnership that builds a great foundation to start.
Is there anything you’d like to add about this project?
Each of the new faculty photoshoot concepts are unique to each cohort. Each year I try a new creative concept, and I tell myself never to repeat that concept with anyone else. So, while there may be other “double exposure” images taken, this specific process will not be repeated and be special specifically to this year’s new faculty cohort. It’s something special that each year’s group can carry with them and them alone. I feel like it’s a gift that strengthens their relationships. As long as I can still find new and unique ways to showcase the personalities of the new faculty, I’ll keep pushing myself in new creative ways.
If you have any questions or have a photo and story that you think would make a great feature next month please contact David.Dick@cwu.edu